Wednesday, December 30, 2009

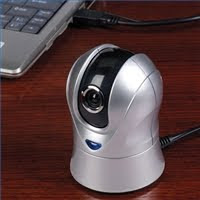
How to Video Chat Online

With technology as it is today, video chatting is no longer left to the limitations of seeing your contact and typing messages. With calling features you can literally call a user's computer and have voice and video conversations. You can register for membership subscriptions with various websites that offer these services, or you can register for free memberships with others. The difference within these two choices are that with paid subscriptions the security of your content and your own safety are at a higher level than the free memberships. With the paid services, there are moderators to whom you can report unlawful actions of other users and have a better chance of securing proof of these actions. Proof is of dire importance in the event that legal action against the perpetrator is necessary.

Instructions

    iVideochat

  1. Step 1

    Register to use iVideochat, on the iVideochat website (ivideochat.com) by selecting "Register for Full Access." Choose check or credit card option. Select subscription. Subscriptions as of 2009, are $9.95 for 30 days, $25.95 for 90 days, and $64.95 for one year.

  2. Step 2

    Enter your information on the form provided. You must provide either a valid credit card number or checking information. The form is loaded on a Secured Socket Link and is encrypted to protect your data. You will enter your user name and nickname for this website membership within this form. When complete select "Complete this purchase."

  3. Step 3

    Log into your iVideochat account. Select "Users in the Lobby," with whom you wish to chat. In order to video chat with these individuals ensure there is a webcam icon beside their name. Select the user to whom you wish to chat, and an Instant Messenger-style box will appear on your screen. You will see a small video box showing the view from your webcam and a large screen view of the user with whom you are chatting.

  4. TokBox

  5. Step 1

    Sign up for TokBox free membership, on the TokBox website at tokbox.com. Enter your name, email address, and new password in the text boxes provided. Select your "Age" from the drop-down list on the screen. Select "Sign up Now."

  6. Step 2

    Log into your new TokBox account by selecting "Log in" at the top right of your screen. Enter your user name and password, then select "Log in."

  7. Step 3

    Select users with whom you wish to video chat. These users can be contacts from any Instant Messenger service with whom you have contacts. You may add these contacts by selecting "Add Contacts" listed under Contacts Menu. Type in their information as you would on popular Instant Messengers such as AIM or sending a request to their email address. You can also video chat with other members of TokBox by searching through the members list by selecting "Search for Friends and entering their name.

  8. Step 4

    Call users with whom you intend to video chat. Select "Call user" in the upper left hand side of your chat screen. Once you select call you will hear a phone ringing. Once they answer you the view from their webcam will appear beside yours on the screen. With the TokBox service you can call multiple users within the same session. To add more user to the conversation, simply select their name and then select "Call user."

How to Remove AVG Extension in Firefox

When upgrading or installing your AVG Anti-virus software, it's your decision whether to install any of the extensions or add-ons. During installation, you can uncheck boxes next to these items to prevent them from being installed. For instance, on Firefox the AVG Safe Search Extension is an extension that is often problematic, according to Mozilla. It can be removed as part of a re-installation or upgrade.

Instructions
  1. Step 1

    Select "Add-ons" in the Firefox "Tools" Menu. Select the "Extensions" tab in the Add-ons dialog box. Select the name of the AVG Extension. Select "Disable." Unlike other Firefox Extensions, you cannot simply select "Uninstall" for AVG Extensions to uninstall them.

  2. Step 2

    Download AVG Anti-virus Free Edition 9.0 from the AVG website linked in Resources. Click "Download" underneath "Free Edition." On the next screen select "Download Now." Once you are redirecfed, select "Download Now," on the CNET website. Select "Save File," when prompted and wait for the download to complete.

  3. Step 3

    Double-click the "AVG Anti-virus Free Edition 9.0" listing in Firefox Downloads. Select "Install." Choose "Recommended Installation." When the dialog box displays showing the file for AVG and AVG Extensions and Add-ons, uncheck the check-boxes for all Extensions/Add-ons you do not want to install. Select "OK," then "Finish."

  4. Step 4

    Remove the previous version of AVG. Select "Control Panel" in the "Start" menu. Select "Uninstall Programs" listed underneath "Programs."

  5. Step 5

    Select the previously installed version of "AVG Anti-virus" in the populated list and select "Uninstall." Once the uninstall is complete, select "OK" and Exit Control Panel. Exit AVG by selecting "X" at the right corner of your screen

How to Find a Saved WEP Key

To find a saved Wired Equivalent Privacy (WEP) key, the wireless router's administrative interface must be accessed with administrative credentials. From the administrative interface, the WEP key may be viewed, deleted or edited. The router's administrative interface is accessed via a specific local IP address. Using this interface with the administrator's user id and password, the saved WEP key may be found with just a few simple steps.

Instructions
  1. Step 1

    Open a web browser and enter the IP address for the router's administrative interface. For Netgear routers, this administrative IP address is typically 192.168.0.1 or 192.168.1.1. Consult the router's manual for the correct IP address for the interface.

  2. Step 2

    Log onto the administrative interface with the administrator's user id and password. The router's manual will include the default user id and password for the router.

  3. Step 3

    Click the "Wireless Settings" link in the interface menu. On Netgear routers, this link is located on the left navigation pane.

  4. Step 4

    Scroll down to the section labeled "Security Encryption (WEP) Key." The key value that is selected by the radio button is the primary WEP key for the wireless access point. Use this key when prompted for the "Network ID" while setting up a wireless network connection from a PC or laptop.

How to download Microsoft Office for Free

So you are looking to download Microsoft Office for Free, but can't seem to find any legal way to download it. You have gone to sites that have links to download Microsoft Office for Free, but they only lead to more ad driven sites. Well you have come to the right place. Now I can't tell you how to download Microsoft Office for Free, but I can tell you how to get a Microsoft Office copycat free of charge. The software package is called OpenOffice and it is free to download. Now this isn't made by some 2nd rate developer, but is made by Sun Microsystems. Sun Microsystems is a pioneer in the computer world and always produce high quality products. So instead of doing something illegal like Downloading Microsoft Office for free simply check out OpenOffice and you will see that it is the same as Microsoft Office and it won't cost you a cent.

Instructions

Things You'll Need:

  • PC
  • Internet Connection
  1. Step 1
    Word
    Word

    GREAT SOFTWARE

    Openoffice is great software, because it is the result of over 20 years of development. It is a completely "open" product which means anyone can report bugs or request new features. Quite simply OpenOffice.org does everything you want from Microsoft Office at a price anyone can afford..FREE!

  2. Step 2
    Excel
    Excel

    EASY TO USE

    If you know how to use Microsoft Office you will feel right at home with OpenOffice.org. If you have files that were created in Microsoft Office you will find that they compatible with OpenOffice.org. Also if you are worried that your native language might not be supported rest assured that it will be, because OpenOffice is developed world-wide in many different languages.

  3. Step 3
    Powerpoint
    Powerpoint

    HONEST SOFTWARE

    OpenOffice.org has been developed using a "No Secrets" approach. In plain English this means that everyone knows what is in it, so there is no funny business going on with it. Everyone knows about how it works and can suggest improvements on it. The statuses of improvements are posted to a public wiki so you can decide if you want to take advantage of enhancements or bug fixes.

  4. Step 4

    5 GREAT OFFICE PROGRAMS

    The OpenOffice.org package gives you a Word Processor, Spreadsheet, Power point Style Program, Database, and Drawing Program. This means that you have the equivalent of Word, Excel, Power Point, and Access. Think of how much these cost and compare it to free and there is no need to spend the coin since you can save the files in Microsoft Office format so there are no compatibility issues.

  5. Step 5

    TOTAL FREEDOM

    In today's age when many people are leaving Microsoft Windows for a Mac, Linux, or Sun it is nice to know that your files can move with you without worry. This is because OpenOffice is made to work on all operating systems and it is nice to know that you will never have to worry about operating systems and your files again.

How to Create a Photoshop Cracked Glass Effect

Make a cracked glass effect in Adobe Photoshop. This is an easy lesson and one of the shortest you'll ever encounter. The main tool we will use is the Craquelure Filter, which that will make 'virtual cracks'. You can use any image for this lesson, but it will work best on images with reflection objects. Photoshop cracked glass effect tutorial >>

Instructions

Things You'll Need:

  • Adobe Photoshop 5.5 ~ CS3
  • Mouse
  • Keyboard
  • A prepared image, preferably with reflections on
  1. Step 1

    Launch your Photoshop and then open an image that you want to work on.

  2. Step 2
    Sample image
    Sample image

    Tutorial use this image. Pick the Polygonal Lasso Tool and trace an area that you want the crack glass effect. In the case of tutorial image, that area is directly under the high heel shoes; the shoe reflection and the white portions on the image following it.

  3. Step 3
    Craquelure Filter
    Craquelure Filter

    With the selection active, go to Filter > Texture > Craquelure. Use the settings on the pop-up dialog to make adjustment until you get the desired effect in the preview. Click OK to apply craquelure effect. Right click mouse any where on the image. From the drop-down, choose "Deselect" to de-active selection.

    For the tutorial: Crack Spacing is '24'. Crack Depth is '5'. Crack Brightness is '7'.

  4. Step 4
    Paint over cracks
    Paint over cracks

    If you want the 'cracks' that are farther from an object appear less prominent: Make a new layer, Layer > New. On the new layer, use the Rectangular Marquee Tool and drag a selection area over the 'cracks' that you want to make appearing less visible.

    With the selection active, grab the Brush Tool (any size you want) and paint over the cracks in the selected portion. Go over the cracks several times to make the them completely covered (invisible). When done painting, right click mouse any where on the image. From the drop-down, choose "Deselect" to de-active selection. You are done with the Photoshop cracked glass effect lesson.

Tuesday, December 29, 2009

How to Connect Sandisk Adapter to a Computer

If you take lots of photographs with your digital camera or download a lot of tunes to your MP3 player, you need a fast and easy way to move those flies back and forth between those devices and your computer. Installing a Sandisk adapter is an excellent way to accomplish that goal. These devices are easy to connect, and they allow you to take files from your camera, MP3 player or other device to and from your computer.

Instructions

Things You'll Need:

  • USB cable
  • Sandisk adapter
  1. Step 1

    Ensure that your computer has at least one free USB port available. If you bought your computer within the last five years, it probably does have plenty of USB ports, but it is important to check before you get started.

  2. Step 2

    Unpack the Sandisk adapter and make sure that all of the needed materials are in the package. Make sure that the package includes a USB cable. If no cable is included, you will need to purchase one separately.

  3. Step 3

    Connect the square end of the USB cable to the back of the Sandisk adapter, then connect the flat end of the cable to a free port on your computer.

  4. Step 4

    Make sure your computer is powered on. You can attach the Sandisk adapter while your computer is on. Then power on the Sandisk adapter and watch the lower right-hand corner of your computer for a "found new hardware" message.

  5. Step 5

    Allow the computer to go through the process of finding the Sandisk adapter and installing the driver for it. If the operating system is unable to find a suitable driver, you will be prompted for the installation CD that came with the adapter.

How to Hook a Plasma TV to a Computer

The electronic devices in many homes seem to have all become integrated. Modern plasma TVs, which are capable of displaying high-definition content, are able to hook up to computers. This is quite easy to do, and allows you use your TV as an external monitor for playing all those games or movies you may have stored on your computer.

Instructions

Things You'll Need:

  • HDMI cable or DVI cable
  1. Step 1

    Determine which type of cable you want to use. Newer computers and plasma televisions typically have HDMI outputs, while older ones will have DVI outputs. Consult your owner's manual for the locations of the ports on your computer and TV, though on laptops they are typically found on the side of the keyboard and on televisions they are found on the back amongst the other audio/video inputs.

  2. Step 2

    Using the corresponding cable, connect the computer's port to the input on your TV, whether it be HDMI or DVI.

  3. Step 3

    Set the plasma television to the corresponding video channel. These should be labeled as HDMI or DVI on your TV's menu and can be found under "Inputs."

  4. Step 4

    Right click the desktop of your computer and highlight "Graphics Options." A submenu should open.

  5. Step 5

    Highlight and select "Output to TV." Your plasma television should flicker and display your computer's desktop.

How to Find a Motherboard's Serial Number

A motherboard is a core component of a computer. The motherboard's serial number may provide very specific information on hardware compatibility that is important for computer upgrades. For instance, you can check if memory modules of a particular type or brand are suitable for your motherboard. There are certain methods to use to retrieve the motherboard's serial number.

Instructions
  1. Step 1

    Log into an administrator account on your computer.

  2. Step 2

    Download or obtain elsewhere a program that would produce the hardware information such as reputable freeware programs available online (HWiNFO32 and PC WIZARD).

  3. Step 3

    Execute the downloaded setup file and follow the onscreen instructions to install the program.

  4. Step 4

    Launch the installed freeware.

  5. Step 5

    If you use HWiNFO32, expand the "Motherboard" entry, and then the "SMBIOS DMI" by clicking on "+" signs. Click on "Mainboard" and read the "Mainboard Serial Number" on the right panel.
    If you use PC Wizard, select the "Hardware" tab on the left and click "Mainboard" under that tab. Click on the "Mainboard" entry on the right panel and read the "Serial Number" in the bottom window under "General Information."

How to Activate a Computer Power Supply

You can set your desktop computer or laptop to automatically activate the power supply if you want the computer system to turn on at a specific time each day. This means that you will not need to press the power button each day to turn your computer's power supply on. Setting the power supply to come on automatically can save time so you do not have to wait while the computer is loading the operating system.

Instructions
  1. Step 1

    Turn on your computer and press the F2 key to access the BIOS.

  2. Step 2

    Tab to the "Power Management" section.

  3. Step 3

    Go to the "Auto On Mode," depending on the model of computer you are using, and press the Enter key on the keyboard.

  4. Step 4

    Change the "Auto On Mode" to "Every Day" or "Weekday Only" and press the Enter key again.

  5. Step 5

    Press the Del key on the keyboard to exit the "Auto On" option.

  6. Step 6

    Tab down to "Auto On Time" and press the Enter key.

  7. Step 7

    Enter the time you would like to have the computer turn on the power supply each day and press the Enter key when complete.

  8. Step 8

    Press the ESC key to exit the BIOS and to restart the computer.

How to Use a Microphone on an eMachine Computer

Adding a microphone to your eMachine computer is an excellent way to enhance your productivity and make that computer more useful. Whether you use your computer for business purposes or strictly personal reasons, it is important to know how to add new pieces of hardware. Adding a microphone to your PC is not difficult, but it is important to know how to test your new hardware.

Instructions
  1. Step 1

    Locate the microphone port on your eMachine desktop or laptop. The microphone jack will probably be located on the front of the unit. On a desktop, it probably will be located near the CD or DVD drive, while the microphone port on a laptop will probably be on the front of the case near the middle.

  2. Step 2

    Plug the microphone into the port on your desktop or laptop. In Vista click on the "Start" button, and type "Sound" in the "Start Search" box. Click the "Recording Tab" and then "Microphone." Click "Properties" and then "Levels" to adjust the recording level for the microphone.

  3. Step 3

    Click on the "Start" button, and choose "Control Panel" if you are running Windows XP. Double-click the "Sounds and Audio Devices" icon, and click the "Audio" tab. Locate the "Sound Recording" section, click the "Volume" tab, and adjust the recording volume to your preferred level.

How to Transfer From a Computer to TV Via USB

Chances are you have a lot of photographs and images stored on your computer. It's likely those digital photographs would look even better on your television set. With the right equipment, you can transfer vacation photos to your television and create a one-of-a-kind slide show that friends and family members are sure to love.

Instructions

Things You'll Need:

  • Computer
  • USB thumb drive
  • Television
  • DVD player (optional)
  1. Step 1

    Make sure that your television has a USB port. Look at the back of the television for a small rectangular slot into which the USB thumb drive will fit. If the TV does not have a USB drive built in, the DVD player attached to it might. Many new DVD players come with USB ports to enable owners to transfer photographs and other files to a television set.

  2. Step 2

    Turn on your computer and insert a USB thumb drive into a free slot on your computer. Locate the files you want to transfer. In many cases, these photographs will be located in the "My Pictures" or "My Documents" folder.

  3. Step 3

    Highlight the files you want to transfer, right-click and choose "Copy." Then highlight the drive letter corresponding to your thumb drive, right-click and choose "Paste" from the menu. This will transfer the files to your USB thumb drive.

  4. Step 4

    Insert the thumb drive into the slot on your television or DVD player. Use the TV or DVD remote to play the slide show.

How to Adjust a Dell Flatscreen Monitor

From brightness, contrast and screen position to color and image settings, Dell flatscreen monitors are fully adjustable. Dell flatscreen monitors even have an "auto adjust" control that automatically adjusts the sharpness and position of whatever is displayed on the monitor's screen, whether it is a spreadsheet, word processing document or other application. Dell flatscreen monitors can also be returned to the original factory settings if you accidentally make a change you don't want or didn't know you were making.

Instructions
  1. Step 1

    Press the "Power" button to turn on your Dell flatscreen monitor. The "Power" button is the last button on the right of the front of the monitor.

  2. Step 2

    Press the "Menu/Select" button to enter the monitor's setup and adjustment menu. The "Menu/Select" button is the second button on the left of the front of your Dell monitor.

  3. Step 3

    Press the "-" or "+" ("Down" or "Up") buttons to make adjustments to your monitor. Each time you press the "-" or "+" button, you will see an adjustment control highlight.

    The "Menu/Select" button acts like the "Enter" key---this button executes the selection you have highlighted.

    After each selection, a sub-menu will appear and a "progress bar" showing a value. Press the "-" and "+" to make adjustments. You will see the affect of the changes on the surrounding screen.

  4. Step 4

    Select "Brightness" to change the monitor's brightness and contrast control. Press the "Menu/Select" button to confirm your selection.

  5. Step 5

    Select "Auto Adjust" to automatically adjust the monitor's sharpness and position of the picture control. Press the "Menu/Select" button to confirm your selection.

  6. Step 6

    Select "Position" to change the monitor's horizontal and vertical position control. Press the "Menu/Select" button to confirm your selection.

  7. Step 7

    Select "Image Settings" to change the monitor's pixel clock and phase control. These settings deal with the sharpness of the text your see on your monitor. Press the "Menu/Select" button to confirm your selection.

  8. Step 8

    Select "Color Settings" to make the monitor appear with a bluer or redder tone. Press the "Menu/Select" button to confirm your selection.

  9. Step 9

    Select "OSD" (on-screen display) to move the position of the "Menu/Select" menu box on the monitor. Press the "Menu/Select" button to confirm your selection.

  10. Step 10

    Select "Language" to change the language used and displayed on the monitor's "Menu/Select" menu box. Press the "Menu/Select" button to confirm your selection.

  11. Step 11

    Select "Audio" to mute the speakers on the monitor when the monitor goes into "power save" or "sleep mode." Press the "Menu/Select" button to confirm your selection.

  12. Step 12

    Select "Factory Reset" to return all the settings on the monitor back to the original settings created by Dell. Press the "Menu/Select" button to confirm your selection.

How Do I Get My Laptop Screen to Show on My Laptop & a Remote Screen?

Use another monitor with your laptop and enjoy better working conditions, while being able to open more programs at once. This is not only more useful for designers and graphic artists running Windows, but also allows you to watch a DVD on one screen while answering email on the other. You can also present to an audience while seeing on your laptop screen what they are seeing on the big screen. projector

    What You Will Need

  1. Hook up your second monitor using the VGA jack on the back or side panel of a laptop. Many people use a second monitor to work in more detail with higher resolution. This comes into its own when you work in design. You will need a decent-sized flat panel with a good resolution. Just about all flat panel monitors come with a VGA socket. Many come with a DVI socket, and some come with HDMI and DisplayPort sockets too. To hook up a Windows laptop, you will need the VGA socket.
  2. Connecting Up

  3. Connect up the second monitor to the laptop, using the VGA port, which is a multi-way blue-colored slanted socket. If you look at it, there are three sets of five sockets, making a 15-pin connection. Usually, the top part is wider than the bottom. Once the monitor is hooked up and switched on, you will need to go to the desktop on the laptop and right-click it to get the display settings. When the box opens, click "Properties" at the bottom. Next, on the far right tab, "Settings," you will see a grey window at the top with two boxes in it, numbered "1" and "2." With the display set to the monitor that you just hooked up, check the box next to the words, "Extend my Windows desktop onto this monitor." You will now need to adjust the screen resolution to get the right proportions. When you have got the correct resolution, (and this may be quite different from the laptop screen, particularly if the laptop is a "wide-screen"), move your mouse to the right of the primary screen (the laptop screen), and you will see the mouse cursor extend on outwardly to the second screen. Drag an application window on to the second screen. If you use Adobe InDesign, PhotoShop or Illustrator, you will find it easier to use the second screen for working in the design window, while administering your Windows laptop in the left screen. When it is all set up, you will wonder how you ever did without it.
  4. Using the Laptop Display To View A Presentation on a Projector

  5. Presenting to an audience is a snap when you have the show on a laptop, and you also have it displaying on a big screen coming out of a projector. Carefully unplug the second monitor from the VGA port and plug in the VGA cord from the projector. Now go back to the display settings again. You will need to go to the desktop on the laptop and right-click it to get the display settings. When the box opens, click "Properties" at the bottom. Next, on the far right tab, "Settings," you will see a grey window at the top with two boxes in it, numbered "1" and "2." With the display set to the monitor that you just hooked up, uncheck the box next to the words, "Extend my Windows desktop onto this monitor." With the system configured like this, you will also be able to view videos on the second display, be it a projector or a second monitor. Windows Media Player lends itself very well to this arrangement and always detects the second monitor when it is plugged in.

How to Video Conference With a Webcam

In today's day and age, webcams enable people to communicate with video in addition to audio. There are many free services online that allow you to have unlimited video chat sessions with family and friends anywhere in the world. This can help keep you in touch and can save you a lot of money over the long run.

Instructions
  1. Step 1

    Purchase and connect a webcam to your computer. This is a simple plug-and-play operation--just connect the webcam through your USB port and microphone jack. There should not be any software or drivers to install for the camera.

  2. Step 2

    Download video-enabled software. Skype and Google Talk allow for free video conferencing. Set up an account and login.

  3. Step 3

    Add your friends as contacts in the software. You will need to know either their usernames or email addresses.

  4. Step 4

    Initiate a conversation online and begin using the webcam. Use the picture-in-picture to make sure your webcam is aimed properly so that your friend can see you properly

How to Video Conference With a Webcam

In today's day and age, webcams enable people to communicate with video in addition to audio. There are many free services online that allow you to have unlimited video chat sessions with family and friends anywhere in the world. This can help keep you in touch and can save you a lot of money over the long run.

Instructions
  1. Step 1

    Purchase and connect a webcam to your computer. This is a simple plug-and-play operation--just connect the webcam through your USB port and microphone jack. There should not be any software or drivers to install for the camera.

  2. Step 2

    Download video-enabled software. Skype and Google Talk allow for free video conferencing. Set up an account and login.

  3. Step 3

    Add your friends as contacts in the software. You will need to know either their usernames or email addresses.

  4. Step 4

    Initiate a conversation online and begin using the webcam. Use the picture-in-picture to make sure your webcam is aimed properly so that your friend can see you properly.

How to Save your Data when Your PC's Operating System Crashes

Your press the power button and nothing happens, or worse horrible noises from your PC's internal speaker blast your eardrums with staccato beeps. Your PC has crashed. You say to yourself "Thats ok, I have a backup.. wait.. DO I? NO!! Oh My God What am I going to do!! My documents, pictures, old emails! Oh No.

Ok - Calm down. I've done this for so long I know every emotion that is racing through your head. To give you some assurance, YES, in MOST situations we can get your data back for you. In some of the worst case scenarios - no. What this article will do is help you take the PROPER steps yourself to get back at your data from there you can decide what else to do. SO, FIRST ~ take a deep breath (Im serious)..take another. Relax. You do NOT want to go into a procedure all flipped out. If you have to go outside and get some air do it. Trust me, I've been an IT Professional for over 20 years, been there done that.

Now that you are calmed down a little, lets get to work ok?

This article can apply to a business workstation scenario too. I will be writing an article on how to recover servers soon.

Instructions

Things You'll Need:

  • Various items
  • Another hard disk (any size over 10 gigs)
  • Preferably another PC - even an older desktop
  • A SATA/IDE adapter ($12-$20) is the most preferred if you have it.
  • Jump/Thumb drive 4 gig or larger.
  1. Step 1

    If you are here its not been a good day for you, dont worry - we'll do what we can to save your data. Its going to depend GREATLY on what other tools you have available. If you have ANOTHER Desktop PC, even an old one (NOT Windows ME, 98, 95 version tho). We will do it like this. If you have an old Windows XP Desktop in the closet Go to STEP 2. If you have another computer thats a Laptop then go to STEP 3. If you dont have ANY other computer handy go to STEP 4.

    If you dont know what a hard drive looks like, look at the picture on Step 2. That is a typical 3.5 inch hard drive used in Desktop PC's.

  2. Step 2
    Drive jumper selection
    Drive jumper selection

    YOU HAVE AN OLD Windows XP computer to help you for this Step. GOOD. Get the old computer out and hook up the monitor, keyboard, Mouse & power. Forget the internet. Power it up. Get the PC on and LOG INTO IT. If you cant log into it thats another thing GO to STEP 5 if you cant remember you old password on this machine. Now if you can log into it - GOOD! Power DOWN. Open the case of your crashed PC. Remove your primary or boot hard drive (some PC's have more than one). Now open the case to the OLD PC and look at the IDE Hard drive cables. One will go to your hard drive, the other to your CD (usually). If only one cable is present disconnect the CD to put you Crashed drive there. One note, look at the little pins on the hard drive and make a note of the jumper positon and make sure the jumper is moved to "CS" or "SLAVE".

    If it has two IDE cables, unhook the CD cable (single) and put your Crashed drive on that. Now, power up your old PC. Most motherboards are defaulted to auto identify new drives. Log onto the PC. Open windows explorer and see if you now see two hard drives - C and usually D. If you do.. your old data is there! Now you have to get to it. You can do a search for your pictures, files (music) etc. If you old drive is not large enough to copy these over, you may need to go buy a jump drive with sufficient space to copy them or get your hands on an external USB hard disk. You could get creative and install a CD Burner in the old PC (the one already in it could be) and burn your files to CD-R (fastest). Emails file extension are .eml, look for those. Dont have or cant get all this? Then try to get your internet connection working on the old PC. Once thats done find one of those FREE ONLINE BACKUP providers and start loading your stuff up there. You can copy it back down once your OLD PC is back up. Go to Step 5

  3. Step 3
    IDE/SATA USB Adapter
    IDE/SATA USB Adapter

    YOU HAVE A LAPTOP Besides your crashed PC. This will be more tricky and will take a little more time but its easy. For this step you will have to go to Best Buy or another technology store for an IDE/SATA USB ADAPTER. Call ahead of time so you wont waste gas. They run about $20.00 (I ordered mine online for $12.00). Now with the SATA/IDE Adapter in your possession and INSTALLED (Drivers) on your laptop.. Take out the HARD DRIVE from your crashed Desktop PC. Plug the power cable of the USB Adapter into hard drive. Now CAREFULLY match up the LARGE pin side of the adapter (look at the slot) and plug it onto it. Now plug the Adapters USB cable into your laptop. WAIT. It sometimes takes even up to a minute for your system to identify a IDE hard drive. Dont worry, you'll see the notifications down on the taskbar. Add/remove hardware wizzard will notify you when it finds it. Once it says the hardware is Ready for Use, open Windows Explorer and look for the newly added drive. Hopefully you have space on your Laptops hard drive for all of your old Pictures, files and music & emails etc. If not get a USB Jump drive while at Best Buy too to copy them over. You can also find one of those FREE ONLINE BACKUP providers and back up your old drive to that. Make sure you do a search for .eml (email files) too and copy those too. Go to Step 5.

  4. Step 4

    YOU HAVE NO OTHER COMPUTER TO USE. This makes recovery more difficult but not impossible. First, call around to your friends and see if they are willing to help you if you bring your old hard drive over to put as a slave on their PC (STEP 2). If not then you are going to have to MANUALLY recover your PC's OS to get at your files again and start over. I cannot go into each and every manufacturers reinstallation. However, I will give you the highlights and warning signs to watch out for. Note that with this step, you WILL loose browser favorites,

    Before you whack your current Operating System, try to find out what error you are seeing and ask a friend to Google it. Maybe there are some other alternative by what you find online. One last little trick you can do is this. Restart your PC. At the POST (when your computer starts) look for "Hit F (whatever) to enter Setup" or "F2 - Setup".. it could be F10 or the "Delete" key. Get into your BIOS. Look for "Load Setup defaults" or "Load Fail-safe configuration". and then SAVE those settings and exit. Try to reboot. I've seen BIOS issues cause crashes before. Just an option to try before going critical mass.

    Once you have started a recovery of your Operating System (with manufacturers OS CD) when it gets to the part about "Formatting" the drive - say NO!! Select "Leave current file System Intact". You can choose "Overwrite Current Operating System" if that choice is asked. Let the installation run to its conclusion after this. Reboot. Now you may have to load drivers for many of your devices, Network card, video cards etc. They usually come in a 2nd CD. If you are out of luck there then you will need to obtain them somehow by getting online somewhere and dowloading the proper drivers. Dell, HP, Gateway all have utilities where you can put in your computers ID, Serial number, Asset tag etc and get all the information about your pc when it was built! If not you may have to buy a new NIC or video card if you cant tell by looking at them (physically) and seeing what make/model they are. You can use a Jump drive (invaluable) if you have to go to a library computer to download them.

  5. Step 5

    Recovering a crashed Operating System presents SO MANY different scenario's its impossible to cover all eventualities. I've tried to give as concise a plan to recover as I possibly could understanding that some problems could easily present themselves to you that may not be covered. In any case, if you have been thwarted at every turn in recovering your data and have NOT suceeded - all is NOT lost. You can STILL contact a professional and get their assistance. It might cost you a little money ($35-$75 or more) but a Professional knows the pitfalls and has all the tools and abilities that years of experience have taught them. This article assumes you have a good working knowledge of PC's and can figure out "next steps" logically also.

    What is crucial above ALL ELSE is this - Why were you NOT backing up? Lessons learned painfully are not forgotten easily. Figure out a way to backup your important data. DO NOT PROCRASTINATE! Even those Free Online backup Providers are a life saver if you've taken the time to use them! My next article will be "Backup Strategies" - LOOK for it under my profile! (Ill get to it asap!)

How to Convert ATA IDE Cables to USB Cables

Many older computer devices used Parallel or Serial IDE cables to connect the device to a computer's motherboard. Newer computers have replaced these connections with different technology, making older storage devices incompatible with newer computers. Fortunately, IDE cables using the AT Attachment (ATA) can be converted to modern Universal Serial Bus (USB) cables using the appropriate adapter. These adapters can be purchased from various computer hardware retailers.This guide will walk you through the process of converting your ATA IDE cables to USB cables so that you can connect your older devices.

Instructions

Things You'll Need:

  • IDE to USB Adapter
  1. Step 1

    Acquire an ATA/IDE to USB cable adapter. These can be purchased from any retailer specializing in computer hardware, such as Amazon.com, Newegg.com, or Tigerdirect.com. For your convenience, links to this product from each of these retailers is provided below, under Resources.

  2. Step 2

    Disconnect both your computer and the IDE device from their respective power sources. This is an important step whenever altering computer hardware, because it protects your devices and yourself from damage caused by electric shock.

  3. Step 3

    Connect the "male" end of the ATA/IDE adapter to your IDE device.

  4. Step 4

    Connect a USB or USB 2.0 cable to the other end of the adapter.

  5. Step 5

    Connect the USB cable to your computer.

  6. Step 6

    Reconnect the IDE device and your computer to their appropriate power sources and turn on your computer.

Thursday, December 24, 2009

How to Stop a Virus in Windows

Having a virus infect your computer can be extremely alarming and distressing, especially if you are unsure about what to do to stop and remove it. Fortunately, the process to stop a virus in Windows isn't complicated, provided that you have the right tools and a clear direction about how to proceed. Even if you can't seem to get the virus removed from your Windows computer, there are other alternatives that you can turn to that will get your computer running again.

Instructions

Things You'll Need:

  • Internet access
  • Administrative privileges on your Windows user account
  1. Step 1

    Boot up your computer in Safe Mode. Safe Mode gives you a better chance at stopping a virus in Windows by only loading necessary drivers and programs when the operating system boots up. To get into Safe Mode, restart your computer and press the F8 key as it boots up. When you see the Windows Boot Menu appear, choose the option that says "Safe Mode with Networking."

  2. Step 2

    Run an antivirus scan on your computer. If you have an antivirus program on your computer already, use its update feature to update it with the latest virus definitions, then run a complete system scan and remove any threats that are found. If you do not have an antivirus program on your computer already, use an online virus scanner such as ESET's online scanner or Trend Micro's HouseCall.

  3. Step 3

    Run an anti-malware scan of your computer with a program such as Malwarebytes, or another reputable anti-malware software program. An anti-malware program can detect malicious software that antivirus programs can't pick up, and it can help stop any malicious software that's running on your computer.

  4. Step 4

    Restart your computer and run another set of antivirus and anti-malware scans after your computer has booted normally. If any infections are found, remove them, restart your computer and perform another scan. You may have to repeat this process multiple times in order to fully stop and remove a virus infection, depending on what type of virus it is and how long it has infected your computer.

How to Uninstall Avira Antivirus

"Avira AntiVir" is a line of antivirus and anti-spyware products. Avira software can be uninstalled using Windows. You might need to use a cleaning utility after the removal to find and delete any remaining traces.

Instructions
  1. Step 1

    From the Start menu, click "Control Panel."

  2. Step 2

    Double-click "Add/Remove Programs" (click "Uninstall a program" in Windows Vista and 7), and click "Avira Antivir."

  3. Step 3

    Click "Remove" ("Uninstall" in Windows Vista and 7) and follow the prompts to uninstall the application.

  4. Step 4

    Restart your computer.

How to Store Music Played on Computer Through Radio Station or Internet

With hundreds of commercial free networks providing every style of music imaginable, Internet radio stations are a great way to listen to the music you like. Check out shoutcast.com for a sampling of what is available. Saving the music you like is simply a matter of downloading the appropriate capture software and recording the music. One great free and easy program for this purpose is the Ask & Record Toolbar.

Instructions

Things You'll Need:

  • Streaming audio from Internet radio or website
  • Ask & Record toolbar
  1. Step 1

    Go to the link under References below. Choose the "Get It Free" link and click "Download." If the download does not begin immediately check the top of your window for a pink or gold security warning in a horizontal bar; click it and give the computer permission to download the file.

  2. Step 2

    Choose "Run" or "Save" from the dialog. "Run" will begin installation automatically. "Save" will download the file and you will have to locate it and install it. Allow the program to continue (if you chose "Run") or navigate to the saved installation file and open it. At the "Welcome" screen choose "Next," then read and agree to the license agreements on the next two pages. Unless you want the program to change your default homepage or default search, uncheck the two boxes on the next page.

  3. Step 3

    Click "Next" and choose the location for install or allow the program to install in the default location in your program files. Select "Start Install." Follow the onscreen prompts, carefully reading options to avoid unwanted changes, and complete the install. The Ask toolbar will now be visible at the top of your browser screen. You Should see a "Record Audio" button.

  4. Step 4

    Navigate to the site you wish to record audio from. Click the "Record Audio" button. If needed, give the program permission to open. This will bring up the "Ask & Record Toolbar" recording dialogue. Play the music file or open the station on Internet radio you choose to record. You will see an audio wave animation in your record dialog box.

  5. Step 5

    Drag the cursor over the box to reveal the "Stop Recording" button. Select it once the music you want has completed playing. Go to "Start," "Documents," then "Ask & Record Toolbar"; inside the folder you will find your audio file saved to your hard drive in MP3 format. It's that simple.

What Is a Drawing Program?

While a lot of people see drawing as something done with a pencil and a piece of paper, many illustrators choose to use drawing programs that can be purchased and installed on their computers. These programs are economical and more convenient in many ways.

    Identification

  1. Your computer can be used to create illustrations using drawing programs.
    Image by Flickr.com, courtesy of Blake Patterson
    Your computer can be used to create illustrations using drawing programs.
    Drawing programs allow users to create drawings using a computer. These drawings are saved in file formats that can be opened by other programs. These images can usually be printed by a printer.
  2. History

  3. The first vector program, Adobe Illustrator, was created in 1987. The first raster program, Adobe Photoshop, was created in 1990.
  4. Input

  5. Drawing programs use a variety of input devices to create the art, such as scanners, tablets, webcams, mouses and keyboards.
  6. Types

  7. Drawing programs are raster or vector. Raster images are made out of small pixels colored differently. Vectors are made out of lines and points. Vectors are more difficult to edit and take up more space than raster images, but they can be resized without ruining the resolution of the image.
  8. Benefits

  9. Drawing programs allow users to create drawings that can be mass produced and that do not degrade in quality. Large quantities of drawings can be stored on a computer and money can also be saved over time, since drawing supplies do not have to be replaced.

How to convert iTunes music like mp3 to M4R iPhone ringtone

You may want to change your iPhone ringtone from time to time but do not want to pay $0.99 for every ringtone. In that case, make your own ringtone sounds to be a good idea. However, there would be another problem which is iPhone ringtone can just be the format of M4R. Then, what can you do? You may need a converter to convert various video or audio formats especially the most popular audio format MP3 into M4R.

With a MP3 to M4R converter, you may not only convert audio format into M4R ringtone, but also take soundtrack from video formats and convert them to ringtone. Check the following easy steps for converting MP3 to M4R.


Instructions
  1. Step 1
    input mp3 file
    input mp3 file

    Input your mp3 audio file
    open iSkysoft iPhone ringtone maker and drag MP3 file directly to the program for making ringtone.

  2. Step 2
    trim mp3 for iphone ringtone
    trim mp3 for iphone ringtone

    Trim MP3 Music to iPhone Ringtone
    Drag and drop the slide bar to appoint the start point and end point for your iPhone ringtone length. Alternatively, you can type exact time value into time-setting box. You can choose to preview the whole YouTube audio or video or just the trimmed part.

  3. Step 3
    generate iphone ringtone
    generate iphone ringtone

    Convert MP3 Music to M4R Ringtone
    After trimming, click Start button to generate the ringtone. The trimmed MP3 music would be converted into M4R ringtone and saved on ringtone category of your iTunes

How to change your Gmail background

Gmail has many features that can make your email more enjoyable, and easier to use. One fun feature is the ability to change the background. This makes it more fun to read your email, and also less recognizable when someone sneaks up on you at work.

Instructions

Things You'll Need:

  • A Gmail account
  1. Step 1

    First log into your Gmail account. At the top, you will notice that there are a number of links you can click on. On the right side, you will find a link called Settings. Click this link to see the various settings you can play with.

  2. Step 2

    Look around at all of the various settings you can control in Gmail. This is awesome! You've got a way to control just about everything in Gmail. But the one we want is at the far right called Themes.

  3. Step 3

    After you click on themes, test a few of the listed themes out. When you click on one of the themes, it automatically changes so you can see what it looks like. Personally, I like the Planets theme, but choose one that matches your personality, or one that will improve your mood when you see it.

How to Mount an ISO on a Virtual CD/DVD ROM

A virtual device is a false piece of hardware in which it tricks your computer into thinking a piece of hardware exists when it doesn't. In this particular case we are talking about a virtual CD/DVD rom. You install a software and your computer thinks you just added a new CD/DVD ROM to your computer. In this guide we go over how to mount an ISO or other disk image onto a virtual CD/DVD ROM.

Instructions

Things You'll Need:

  • Computer
  • Internet
  • Daemon Tools
  • ISO
  1. Step 1

    Before you can even begin you need to install the Virtual Device or Virtual CD/DVD ROM onto your computer. There are several different types available but the most flexible is Daemon Tool. Daemon Tools will install a single Virtual CD/DVD ROM onto your computer.

  2. Step 2

    After you have installed and up your Virtual CD/DVD ROM you will need to get a hold of an ISO or other image file. Once it is loaded you will see a small icon on your task bar, near your system clock. It will look like a silver circle with a lightning bolt through it.

  3. Step 3
    Virtual Device Daemon Tools ISO Mount
    Virtual Device Daemon Tools ISO Mount

    Click the Daemon Tools icon and a list will come up, you should click on Device 0 [Z]:No Media. The letter inside the [ and ] will vary and depend a lot on your computer settings. Once you click that you can browse to your ISO or other image file, this will mount the ISO file on the Daemon tools virtual CD/DVD ROM.

  4. Step 4
    ISO Virtual Device Daemon Tools CD ROM
    ISO Virtual Device Daemon Tools CD ROM

    After you have loaded the ISO or image the program you are trying to load should automatically run. If it doesn't you can simply navigate to the virtual CD/DVD ROM device through My Computer and double click the virtual CD/DVD ROM device to browse the ISO or image. It should take on the name and icon of the ISO you are loading. In the picture example I used an ISO labeled Stef2_disk1.

How to Online Project Management Software

Our management software supports: Task Management, Resource Management, Project Tracking, Employee Time Tracking to add to the simple coordination of your projects.

Instructions
  1. Step 1

    Online Project Management Software is a web-based management tool that is fully customizable to your projects and your work flow. One of the versatile products that help project managers is project management software. Very often, the managers are expected to handle multiple projects at the same time. Multiple projects can be highly challenging and stressful to the manager. Handling projects easily and efficiently by making use of our robust software tools is the focus we put on our product design. There are various factors that need to be taken into consideration while managing a project. Factors such as scheduling, resource allocation, cost control, quality control, risk management, etc. Keeping track of all of them can be highly complicated. Keeping track of each one's progress and performance will not be an easy task if it has to be handled manually. Efforts required by the project manager to coordinate various aspects of the project will be reduced considerably when you use effective project management software tools. Project Drive software will help the project manager become more efficient.

  2. Step 2

    Our management software supports: Task Management, Resource Management, Project Tracking, Employee Time Tracking to add to the simple coordination of your projects.

  3. Step 3
    Online Project Management Software
    Online Project Management Software

    Specifications Requirements Analysis, Feasibility Study, Choosing System Design, Design Phase, Project Execution, Control and Monitor, Project Closure. Most projects will fall into these management phases with minor variation in these phases depending on the specific project at hand.

  4. Step 4

    Therefore, Our Online Project Management Software was designed to assist in all project phases before setting out to launch your project. Our software guides you through your management methodology and co-defines the many minor phases of project management relevant to your specific project.

  5. Step 5

    Today organizations realize the importance of the need for universal project management standards.Project Drive software provides just that. When international project management standards are followed, we will be able to take over a project at any stage and complete it successfully without being dependent on the original development team.

  6. Step 6

    Project Drive is an easy to implement and simple to use web-based project management software that is fully customizable to your projects and your work flow.

  7. Step 7

    Choose Project Drive project management software for your company's needs.